HTMLBox Pro — Complete Installation Guide
HTMLBox Pro adds professional content block management to PrestaShop — create, schedule, target, and A/B-test HTML/CSS content in any of 40+ hook positions on your storefront, without editing theme files or touching code. This guide covers installation, a first-block walkthrough, multistore setup, and what the module looks like before and after activation.
Requirements
| Requirement | Minimum version | |---|---| | PrestaShop | 8.0 (tested up to 9.0.3) | | PHP | 8.1 (compatible with 8.1, 8.2, 8.3, 8.4) |
No additional PHP extensions required beyond the standard PrestaShop stack. HTMLBox Pro uses only PrestaShop's native hook system and the database.
What Your Store Looks Like Before and After
Before installation
Your storefront has no custom HTML content blocks. The hook positions available in PrestaShop's theme exist, but nothing is registered to them — they render nothing. Your theme's built-in content (header, navigation, product grid, footer) is all that appears.
After installation and creating your first block
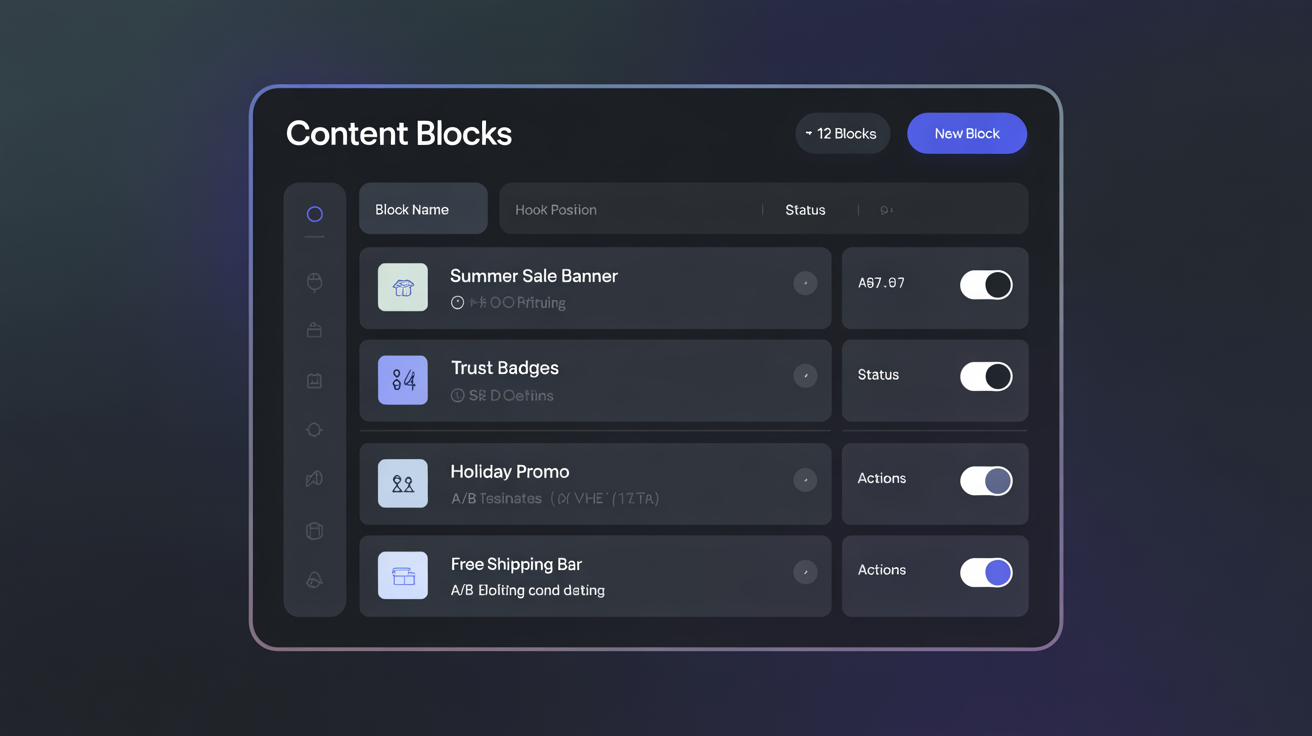
You have a management panel in your PrestaShop back office where you create, enable, and arrange content blocks. Each block is assigned to one of 40+ hook positions. When customers visit pages where those hooks are placed, your block content renders inline — exactly your HTML, no wrappers or modifications.
For example, an announcement bar assigned to displayTop appears on every page below the header. A trust badge block assigned to displayProductAdditionalInfo appears below the "Add to Cart" button on every product page.
Step 1: Download
After purchasing HTMLBox Pro, you will receive a download link by email within a few minutes. Download the ZIP file — it is named htmlboxpro.zip and is ready for direct upload to PrestaShop.
Keep the ZIP file intact. Do not unzip it before uploading.
If you do not receive the email, check your spam folder. You can also download at any time from your plugkit.io account under My Orders → Downloads.
Step 2: Upload to PrestaShop
- Log in to your PrestaShop Admin Panel
- Navigate to Modules → Module Manager
- Click "Upload a module" in the top-right corner
- Select the
htmlboxpro.zipfile you downloaded - Wait for the upload and installation to complete — typically 5–10 seconds
Once installed, the module appears in your module list as "HTMLBox Pro — Custom Content Blocks". You will see a green "Installed" badge next to it and a "Configure" button.
On first open, the block list will be empty. This is correct — you have not created any blocks yet.
If the upload fails
| Symptom | Cause | Fix |
|---|---|---|
| "File too large" error | upload_max_filesize PHP limit | Ask your host to increase it — the ZIP is under 1MB |
| Module does not appear after upload | ZIP was renamed or corrupted | Re-download from plugkit.io and retry |
| "Cannot write to /modules/" error | Directory permissions | Ensure the modules/ directory is writable by the web server (permissions 755 on most hosts) |
| White screen after upload | PHP error during installation | Check Advanced Parameters → Logs for PHP errors |
Step 3: Clear Cache After Installation
HTMLBox Pro registers its hooks during installation, but PrestaShop's class cache may not pick them up immediately on stores with aggressive caching.
After installing, always clear the PrestaShop cache:
- Go to Advanced Parameters → Performance
- Click "Clear cache"
- Confirm
This ensures the module's hooks are registered correctly before you create your first block.
5-Minute Quick Start: Your First Block
This walkthrough creates a simple announcement bar on every page of your store in under 5 minutes.
Step 1: Open the management panel
Click "Configure" on the HTMLBox Pro module entry in Module Manager.
Step 2: Create a new block
Click "Add New Block" in the top-right corner.
Step 3: Name your block
Enter a descriptive name, for example: Announcement Bar — Free Shipping. The name is for your reference only — customers never see it.
Step 4: Choose a hook
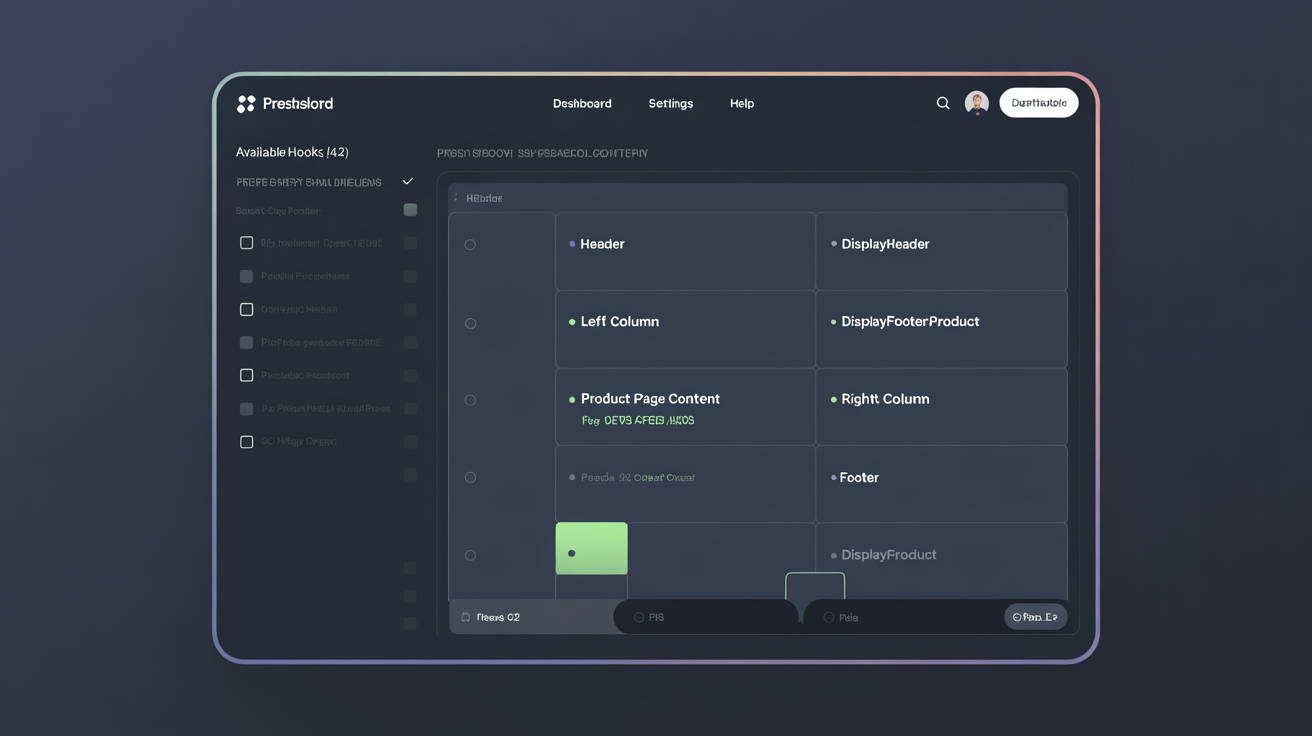
Click the "Hook Position" field. The visual hook selector opens showing a wireframe of your storefront with available positions highlighted.
For a sitewide announcement bar, click the area below the header — this selects displayTop. You will see the hook name displayTop appear in the field.
Step 5: Write your content
In the WYSIWYG editor, type your announcement:
Free shipping on orders over €50. Use code FREESHIP at checkout.
Or switch to Code Mode (the < > toolbar button) for more control:
<div style="background:#1a56db;color:#fff;text-align:center;padding:10px 16px;font-size:14px;">
Free shipping on orders over <strong>€50</strong> — use code <strong>FREESHIP</strong>
·
<a href="/sale" style="color:#bfdbfe;text-decoration:underline;">Shop now</a>
</div>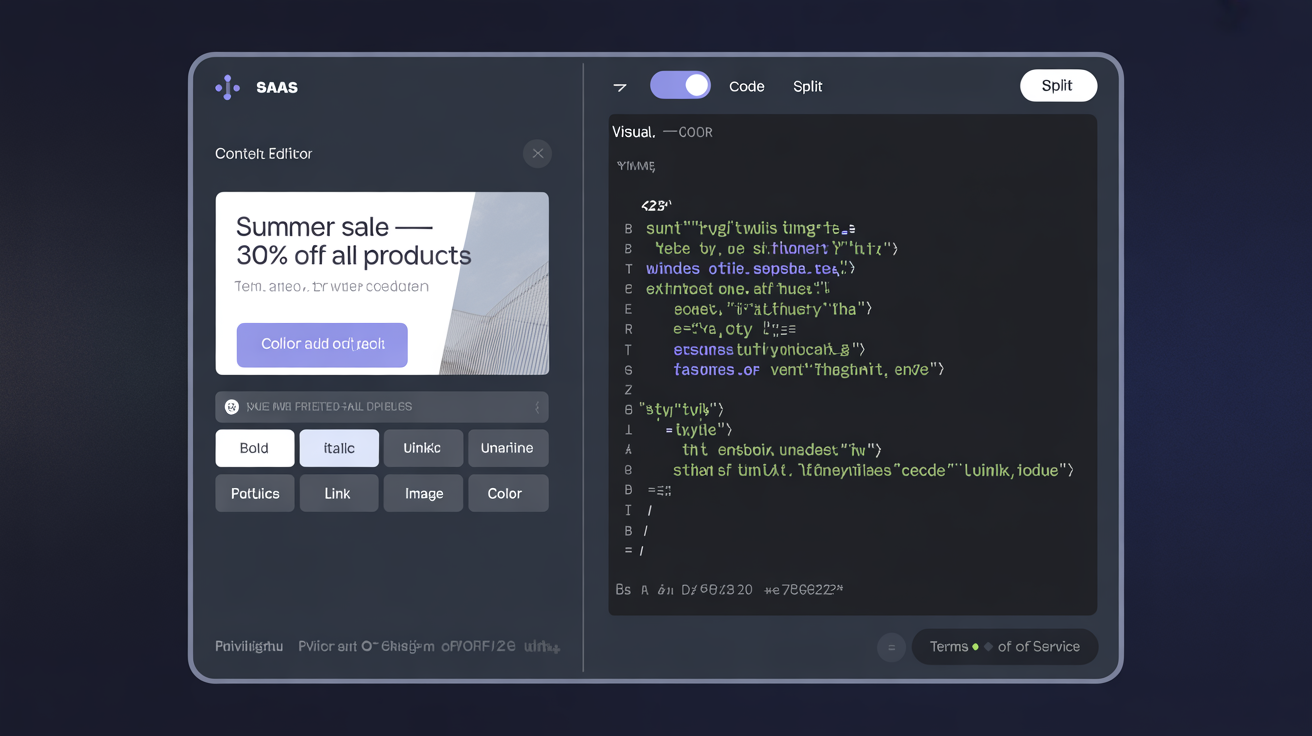
Step 6: Save
Click "Save" in the top-right corner of the editor. Your block is immediately live.
Step 7: Verify on the storefront
Open your store's front page in a new browser tab. The announcement bar should appear on every page below the header.

If the block does not appear, see the Troubleshooting guide — the most common causes are a stale cache or a missing hook in the theme.
Multistore Setup
HTMLBox Pro supports PrestaShop's multistore feature. Each shop can have its own set of blocks, or blocks can be shared across all shops.
Installing on all shops
- In the PrestaShop admin header, select "All Shops" from the shop context dropdown
- Upload and install HTMLBox Pro as described above
- The module is installed across all shops simultaneously
Creating shop-specific blocks
- In the admin header, select the specific shop you want to target (e.g., "Germany Store")
- Open HTMLBox Pro configuration
- Create blocks — they will only appear on the selected shop
Creating blocks visible on all shops
- Select "All Shops" in the admin header
- Create the block — it appears on every shop
Copying blocks between shops
Use the import/export feature in HTMLBox Pro:
- In the source shop context, go to the block list and click "Export"
- Download the JSON file
- Switch to the target shop context
- Click "Import" and upload the JSON file
- The block is created in the target shop with the same settings
Multistore caution
A block created in "All Shops" context cannot be edited from a specific shop context — you must switch to "All Shops" to edit it. This prevents accidental shop-specific overrides of global blocks.
Upgrading HTMLBox Pro
When a new version is available:
- Download the new ZIP from your plugkit.io account
- Upload it via Modules → Module Manager → "Upload a module"
- PrestaShop detects the existing installation and updates in place — your blocks and configuration are preserved
- Clear cache after upgrading: Advanced Parameters → Performance → Clear cache
Post-Installation Checklist
- [ ] Module is visible in Module Manager with "Installed" status
- [ ] Cache was cleared after installation
- [ ] Block list opens correctly (Configure button works)
- [ ] Created a test block assigned to a hook
- [ ] Block appears on the correct page on the storefront
- [ ] If multistore: module installed and configured for each relevant shop
- [ ] Block editor (WYSIWYG and Code mode) loads without JavaScript errors
Next Steps
- Configuration Guide — editor modes, hook selection, conditions, scheduling, and all settings in detail
- Hook Position Guide — complete reference of all 40+ hook positions with descriptions and use cases
- Real-World Examples — 10+ practical examples with full HTML code you can copy