HTMLBox Pro — Complete Configuration Reference
HTMLBox Pro's block editor is the central tool for creating and managing content blocks on your PrestaShop storefront. This guide covers every setting, every editor mode, all toolbar buttons, how CSS scoping works, available Twig variables, responsive visibility, and cache management.
Opening the Editor
From the HTMLBox Pro block list, either:
- Click "Add New Block" to create a new block
- Click "Edit" on any existing block to modify it
The editor opens with the block's current settings loaded. Changes are not saved until you click "Save".
Block List View
The block list is your control centre for all content blocks.
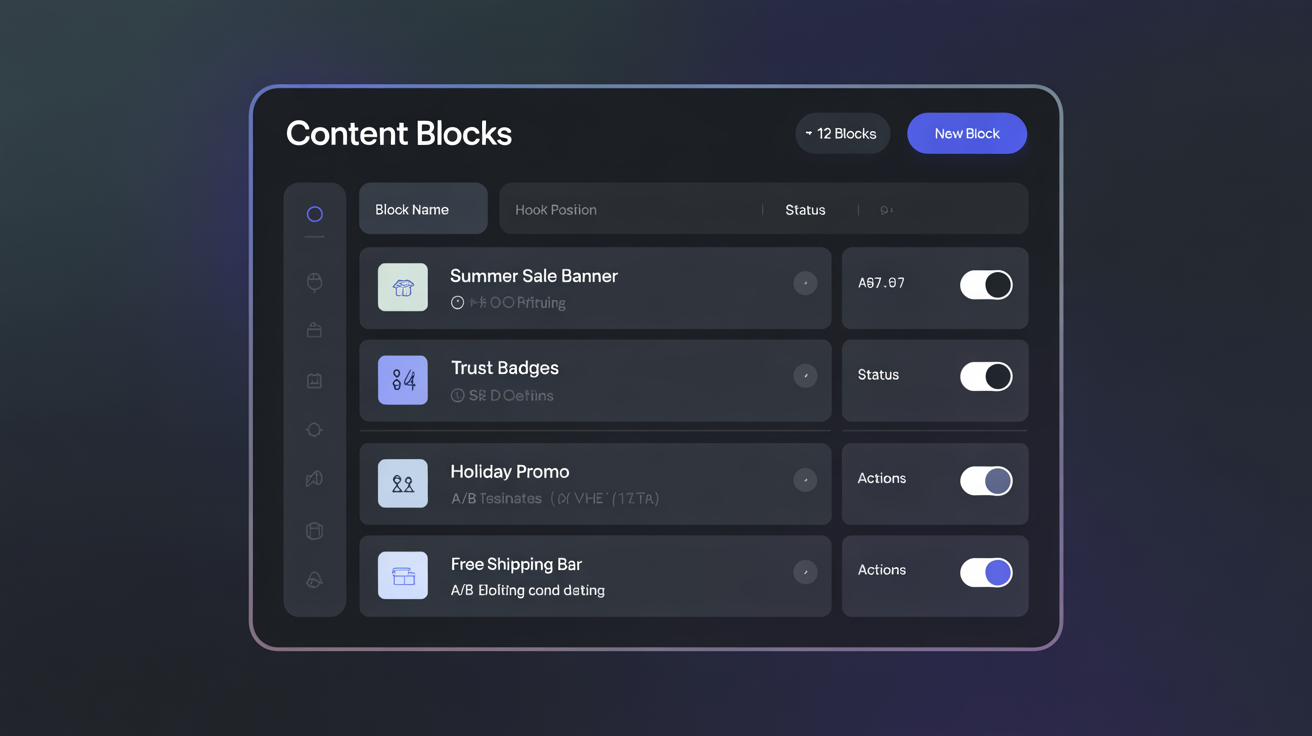
Each row in the block list shows:
| Column | What it shows | |---|---| | Enable/disable toggle | Green = live on storefront. Grey = draft/disabled. | | Block name | Your internal label | | Hook | Which hook position this block is assigned to | | Conditions | Summary of any targeting conditions set | | A/B test indicator | Shows if an A/B test is running on this block | | Action buttons | Edit, Duplicate, Clear Cache, Delete |
Block ordering
When multiple blocks are assigned to the same hook, the order in the block list controls the render order on the storefront. The block at the top of the list renders first (topmost position on the page). Drag rows to reorder.
Practical example: If you have two blocks on displayTop — a cookie notice and a promotional banner — put the cookie notice above the banner so it renders above it on the page.
Duplicating a block
Click the "Duplicate" action to create a copy of a block with all its settings (hook, conditions, schedule, content) preserved. The duplicate is created as disabled. Useful when creating language variants of the same block — duplicate, change the language condition, translate the content.
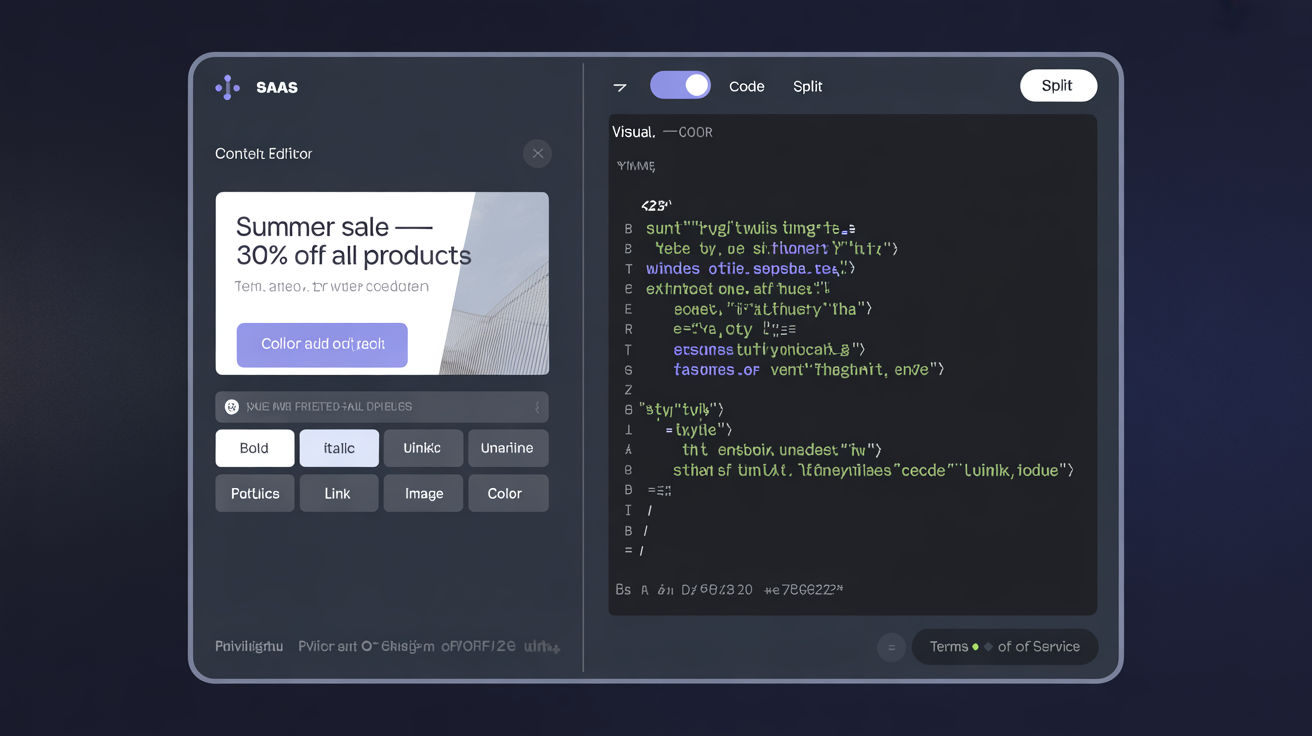
Content Editor Modes
HTMLBox Pro offers three editing modes, selectable via the mode buttons at the top of the editor area. Switch between them freely at any time — your content is preserved across mode switches.
WYSIWYG Mode
A full visual editor powered by TinyMCE, with a rich formatting toolbar. Write content visually without touching any code.

What the toolbar buttons do:
| Button group | Buttons | Purpose |
|---|---|---|
| Text formatting | Bold, Italic, Underline, Strikethrough | Standard text decoration |
| Style | Paragraph, Heading 1–6, Preformatted | Block-level text styles |
| Lists | Unordered list, Ordered list, Indent, Outdent | List creation and nesting |
| Links | Insert/edit link, Unlink, Anchor | Hyperlink management |
| Media | Insert image, Insert video embed | Media embedding |
| Tables | Table, Table properties, Cell, Row, Column | Interactive table builder |
| Alignment | Left, Center, Right, Justify | Text alignment |
| Colours | Text colour, Background colour | Inline colour styling |
| Special characters | Ω icon | Insert special characters and symbols |
| Source code | < > button | Switch to Code Mode |
| Find/Replace | Binoculars icon | Text search within the editor content |
Copy-paste from external sources:
The WYSIWYG editor accepts paste from Word and Google Docs, preserving:
- Bold, italic, underline
- Heading styles (mapped to H1–H6)
- Lists (bulleted and numbered)
- Simple table structures
It strips unsupported formatting (Word's custom styles, Google Docs annotations) automatically. Images pasted from clipboard are not embedded as base64 — use the Insert Image button to upload or link images properly.
When to use WYSIWYG mode:
- Marketing copy, announcements, promotional text
- Content created by non-technical team members
- Text-heavy blocks like category descriptions or FAQ sections
- Any block where you are writing formatted text rather than building a layout
Code Mode
A syntax-highlighted code editor supporting HTML, CSS, and JavaScript. Write raw markup with full control.
Editor features:
- Syntax highlighting for HTML tags, attributes, CSS properties, and JavaScript
- Auto-closing brackets and tags
- Auto-indentation
- Find and Replace (Ctrl+H / Cmd+H)
- Line numbers
What you can include in Code Mode:
- Any valid HTML markup
- Inline
<style>blocks <script>blocks (JavaScript)- External resource references (CDN links for fonts, icon libraries)
- SVG markup
- Template variables (Twig syntax — see below)
What is NOT sanitized or modified:
In Code Mode, your HTML is saved exactly as written and rendered exactly as written on the storefront. HTMLBox Pro does not strip tags, modify attributes, or rewrite URLs. This means:
- You can use any CSS class names (yours, Bootstrap, your theme's classes)
- You can include event handlers (
onclick,onmouseover) - You can embed
<iframe>tags for Google Maps, YouTube, etc. - You are responsible for the security and validity of your markup
When to use Code Mode:
- Custom layouts (Flexbox, Grid, multi-column designs)
- Interactive components (accordions, tabs, sliders)
- Third-party widget embed codes (chat widgets, review badges, trust seals)
- Blocks requiring precise HTML structure
- Any block with CSS animations or JavaScript interaction
Split Mode
Both editors visible simultaneously — code on the left, visual preview on the right. The preview updates in real time as you type.
When to use Split Mode:
- Building complex layouts where you need to balance code precision with visual feedback
- Learning which HTML constructs correspond to which visual result
- Fine-tuning padding, margins, and spacing while watching the result update
Note: Split Mode is CPU-intensive for very large blocks. For blocks over 500 lines of HTML, Code Mode alone is more responsive.
CSS Scoping Rules
CSS written inside a block's <style> tag is scoped to the block's output container by default. The module wraps each block in a container with a unique class (htmlboxpro-block-{id}), and CSS selectors are rewritten to target only that container.
What this means in practice:
/* What you write: */
.banner { background: #1a56db; }
h2 { color: white; }

/* What is applied on the storefront: */
.htmlboxpro-block-42 .banner { background: #1a56db; }
.htmlboxpro-block-42 h2 { color: white; }
Your h2 style only affects headings inside your block — it does not override the theme's global heading styles elsewhere on the page.
Overriding scoping (targeting global elements):
If you intentionally need to target global elements, use the :root selector or start your selector with body:
/* This targets the page globally, bypassing block scoping: */
body .theme-header { background: navy; }
Use this carefully — global overrides from a content block can affect every page the block appears on.
CSS class and ID fields:
In the block settings below the editor, two fields add custom class names and IDs to the block's wrapper element:
- CSS Class: Adds a class to the outer wrapper (e.g.,
promotion-block seasonal-blue) — lets you style the block from your theme's CSS - CSS ID: Adds an ID to the wrapper (e.g.,
summer-campaign-banner) — allows JavaScript targeting and deep-link anchoring
Twig Variables
In Code Mode, you can use Twig template variables to personalise block content dynamically. HTMLBox Pro evaluates the block through PrestaShop's Smarty/Twig rendering pipeline before injecting it into the hook.
Available variables:
| Variable | Type | Value |
|---|---|---|
| {$customer.firstname} | string | Logged-in customer's first name |
| {$customer.lastname} | string | Logged-in customer's last name |
| {$customer.email} | string | Logged-in customer's email address |
| {$customer.is_logged_in} | bool | True if the visitor is logged in |
| {$customer.id_default_group} | int | Customer's default group ID |
| {$shop.name} | string | Store name |
| {$shop.url} | string | Store URL |
| {$language.iso_code} | string | Current language ISO code (e.g., en, de, pl) |
| {$currency.iso_code} | string | Current currency ISO code (e.g., EUR, PLN) |
| {$cart.products_count} | int | Number of products in the current cart |
| {$cart.total_price} | float | Cart total |
Example — personalised greeting for logged-in customers:
{if $customer.is_logged_in}
<div class="welcome-back">
  Welcome back, <strong>{$customer.firstname}</strong>!
  <a href="/account">View your account</a>
</div>
{/if}
Example — language-specific content within a single block:
{if $language.iso_code == 'pl'}
<p>Darmowa dostawa od 200 zł</p>
{elseif $language.iso_code == 'de'}
<p>Kostenloser Versand ab €50</p>
{else}
<p>Free shipping on orders over €50</p>
{/if}
Note: Twig variables are evaluated server-side. They are not accessible via JavaScript in the browser. For client-side personalisation (e.g., updating content after the page loads), use PrestaShop's JavaScript prestashop global object.
Hook Position Selection
Each block is assigned to exactly one hook position. To change the hook, open the block editor and modify the Hook Position field.
Visual hook selector:
Click anywhere in the Hook Position field to open the visual selector — a wireframe diagram of your storefront with all available hook positions highlighted as clickable regions.
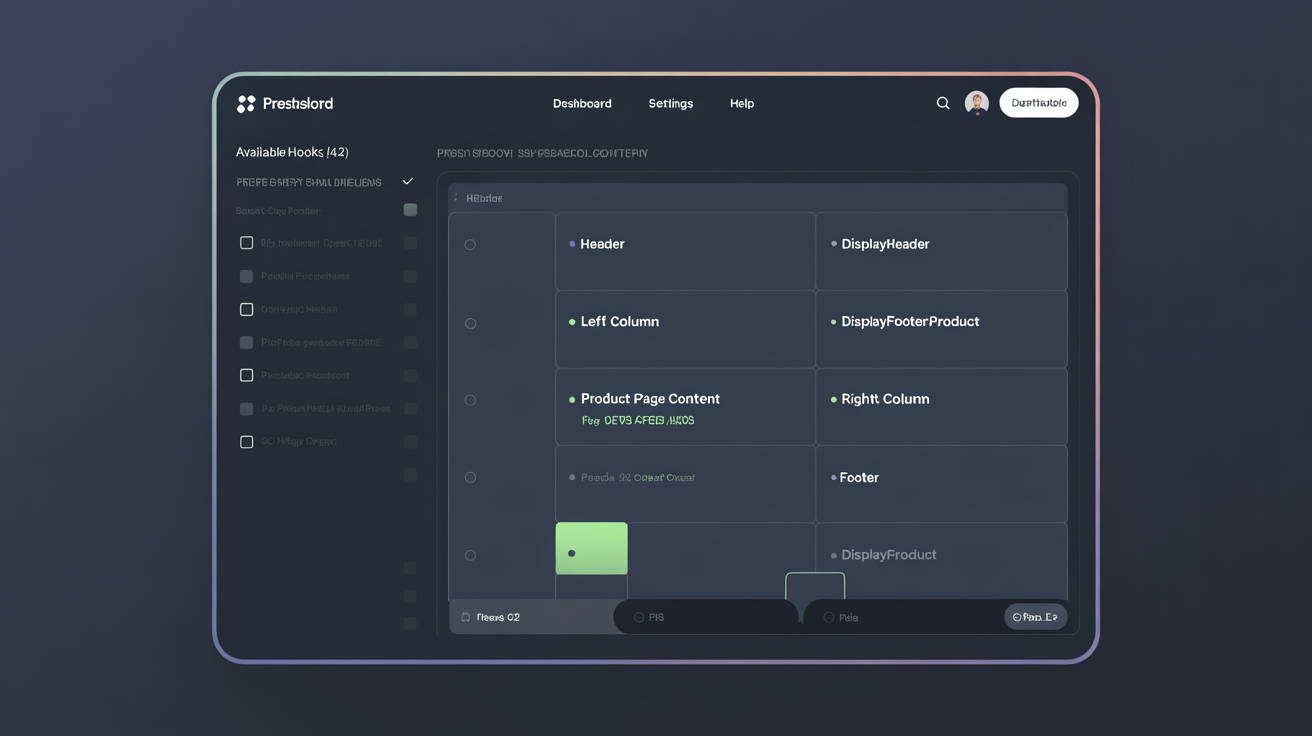
Click any highlighted region to select that hook. The technical hook name and a short description appear below the wireframe. For a full reference of all 40+ supported hooks with descriptions and use cases, see the Hook Position Guide.
Responsive Visibility Controls
Control which device sizes display each block. Three toggles, each independent:
| Toggle | Screen width | When to disable | |---|---|---| | Desktop | > 992px | Block is desktop-only (e.g., wide multi-column layout that breaks on mobile) | | Tablet | 768px – 991px | Block does not look right at medium widths | | Mobile | < 768px | Block is redundant or cluttered on mobile (e.g., a sidebar block where the sidebar collapses on mobile) |
Example: A displayLeftColumn sidebar block with product recommendations — on desktop it renders usefully in the sidebar. On mobile, the sidebar collapses to a small toggle area or disappears entirely in most themes. Disable the mobile toggle to prevent the block from rendering in an invisible or unstyled location.
How it works technically: Device visibility uses CSS display: none with responsive media queries injected alongside the block's output — the block HTML is still in the DOM but hidden via CSS. This means the block renders server-side regardless of device; the hiding is client-side. For blocks with significant JavaScript, consider using Conditions instead to avoid loading scripts on devices where the block is hidden.
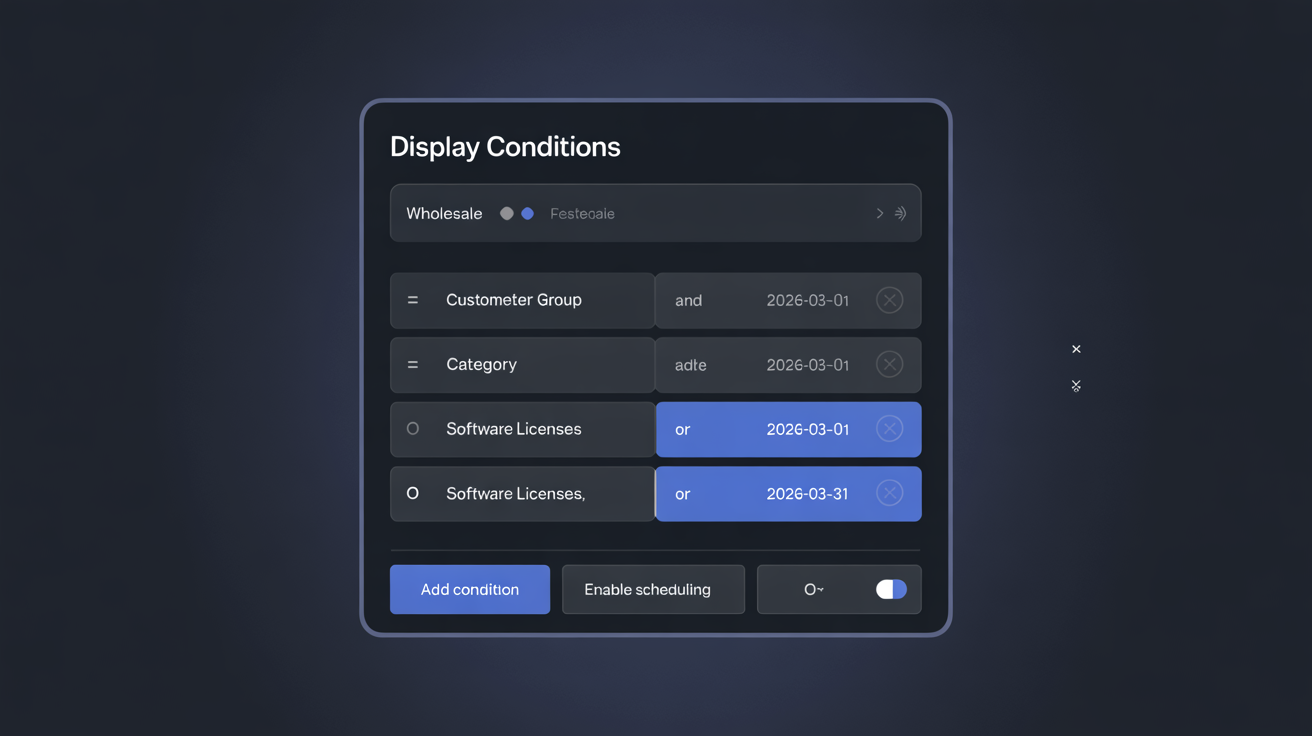
Conditional Display Rules
Target specific audiences with each block. Conditions are evaluated server-side — blocks for which conditions do not match are never sent to the browser.

Available condition types: Customer Group, Category, Product, Manufacturer, Language, Country / Zone.
For a complete explanation of every condition type with examples and AND/OR logic, see the dedicated Conditions guide.
Scheduling
Set date ranges for automatic block activation and deactivation.
| Field | Behaviour | |---|---| | Start Date | Block becomes visible at 00:00 store time on this date | | End Date | Block becomes hidden at 23:59 store time on this date | | Start only | Block activates on start date and stays visible indefinitely | | End only | Block is visible now and disappears on the end date | | Neither | Block is always visible when enabled |
Timezone: Scheduling uses the store's configured timezone (International → Localization → Timezone). If your server is in a different timezone from your store's target audience, this matters — a block scheduled to start at 08:00 Warsaw time activates at 07:00 UTC in winter and 06:00 UTC in summer.
Cache interaction: Scheduled activation relies on the block cache being refreshed at the scheduled time. For stores with long cache TTLs, the block may not appear or disappear exactly at the scheduled second. To force an immediate schedule change, manually clear the HTMLBox Pro cache from the block list toolbar after changing schedule settings.
A/B Testing
Run two content variants against each other to find which drives more conversions. A/B tests do not affect block availability — the block is live during the test, split between two variants. See the full A/B Testing guide for setup and result interpretation.
Media Management
Inserting images in WYSIWYG Mode
Click the Insert Image toolbar button to open the image dialog:
- Image URL: Link to any externally hosted image
- Upload: Upload an image to PrestaShop's media library — it is stored in your store's
/upload/directory - Alt text: Always fill in for SEO and accessibility
Images uploaded via the editor are stored in PrestaShop's standard media directory and served through your store's CDN or web server. There is no separate HTMLBox Pro media storage.
Inserting images in Code Mode
<img src="/modules/htmlboxpro/img/custom/banner.jpg" alt="Summer sale" width="1200" height="400" loading="lazy">You can also use paths relative to your store's root:
<img src="/img/custom-banners/summer-2026.jpg" alt="Summer sale">Upload images to your server via FTP/SFTP, then reference them with their web-accessible path.
Best practices for images in blocks
- Use WebP format for smaller file sizes (PrestaShop 8.x supports WebP natively)
- Always specify
widthandheightattributes to prevent layout shift (Core Web Vitals) - Use
loading="lazy"on images below the fold to improve initial page load time - Use a descriptive
altattribute — required for accessibility compliance
Cache Settings
HTMLBox Pro caches rendered blocks in PrestaShop's cache layer. Cache is automatically invalidated when:
- Block content is saved
- A condition is changed
- A schedule date is updated
- The block is enabled or disabled
- A scheduled start or end date is reached (next cache refresh)
Manual cache clearing
From the block list toolbar, click "Clear Cache" to invalidate the HTMLBox Pro cache immediately. This forces all blocks to be re-evaluated and re-rendered on the next page load.
You can also clear cache for a single block using the "Clear Cache" action button in the block row.
Also clear PrestaShop's main cache after making significant changes:
- Advanced Parameters → Performance → Clear cache
This clears both HTMLBox Pro's block cache and PrestaShop's compiled template cache, which can sometimes retain old block output.
Next Steps
- Hook Position Guide — every hook position explained with use cases
- Conditional Display Rules — target specific audiences with AND/OR condition logic
- A/B Testing Guide — split-test two content variants
- Real-World Examples — complete code examples for 10+ common use cases