Installation
Fakturownia Pro for Shopify connects your Shopify store to Fakturownia.pl or InvoiceOcean, automatically generating Polish VAT invoices for every order. This guide covers everything from installing the app to issuing your first invoice.
Requirements
Before installing, confirm you have the following:
- A Shopify store on any paid plan (Basic, Shopify, Advanced, or Plus)
- Admin access to install apps from the Shopify App Store
- An active Fakturownia.pl or InvoiceOcean account — any paid plan (the free Fakturownia tier has API rate limits that may interfere with high-volume stores)
- Your Fakturownia API token — see Step 2 for where to find it
Step 1: Install from the Shopify App Store
- Visit the Fakturownia Pro listing on the Shopify App Store
- Click "Add app"
- Review the requested permissions (explained below) and click "Install app"
- The app appears in your Shopify admin under Apps → Fakturownia Pro
Permissions Requested and Why
| Permission | Why it is needed | |---|---| | Read orders | Reads order details (products, quantities, prices, customer data) to generate accurate invoice content | | Write orders | Stores the Fakturownia invoice ID and number back on the Shopify order for reference and deduplication | | Read customers | Reads billing name and email from the customer record for the invoice buyer block | | Read products | Reads product names and tax rates for invoice line items | | Write customer account pages | Injects the "Invoices" section into Shopify customer accounts (customer portal feature) |
Fakturownia Pro does not request payment information, checkout configuration, or theme access. It communicates with Fakturownia.pl exclusively through their REST API using your API token — no credentials are stored outside the encrypted app configuration.
Step 2: Connect Your Fakturownia Account
After installation, the app opens automatically and prompts you to connect your Fakturownia account.
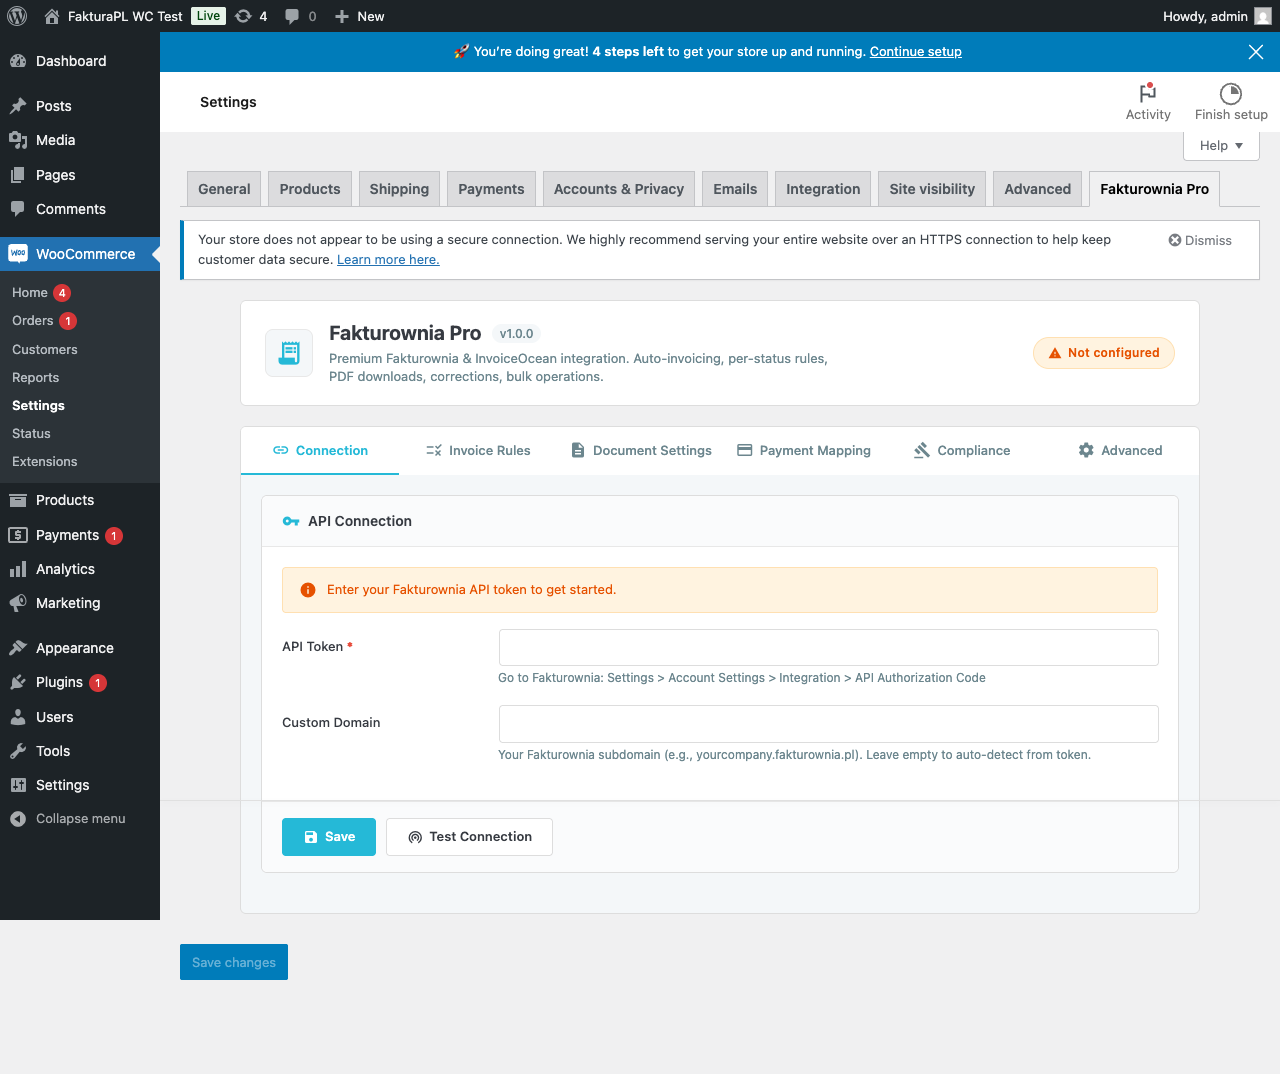
Finding Your API Token
The API token is the primary credential for the Fakturownia.pl REST API. To locate it:
- Log in to your Fakturownia.pl or InvoiceOcean account at
app.fakturownia.pl - Click your account name (top right) → Settings
- Go to the Account tab → Integration section
- Find "API Authorization Code" — this is your token
The token looks like: AbCdEfGhIjKlMnOpQrStUvWx1234567890/yourcompany.fakturownia.pl
The domain portion is mandatory: The token includes a slash followed by your Fakturownia subdomain (e.g., /yourcompany.fakturownia.pl). You must paste the entire string including the domain — the app will not connect if only the alphanumeric portion is entered.
Custom Domains
If your Fakturownia account uses a custom domain (e.g., invoices.yourbrand.com), enter it in the Custom Domain field. Leave this field blank if you use the standard yourcompany.fakturownia.pl format. The app auto-detects the subdomain from the token string when no custom domain is specified.
Testing the Connection
After entering your token, click "Test Connection". The app makes a live call to the Fakturownia API. A green "Connected" indicator and your account name confirm the link is working.
If the connection test fails:
- Verify the token is pasted in full, including the
/yourcompany.fakturownia.plportion - Check for trailing spaces at the end of the pasted token
- Confirm your Fakturownia account plan is active and not expired
- See Troubleshooting for specific error codes
Step 3: Configure Invoice Rules
Invoice rules define which Fakturownia document is created at each Shopify order status change. The setup wizard shows a recommended configuration:
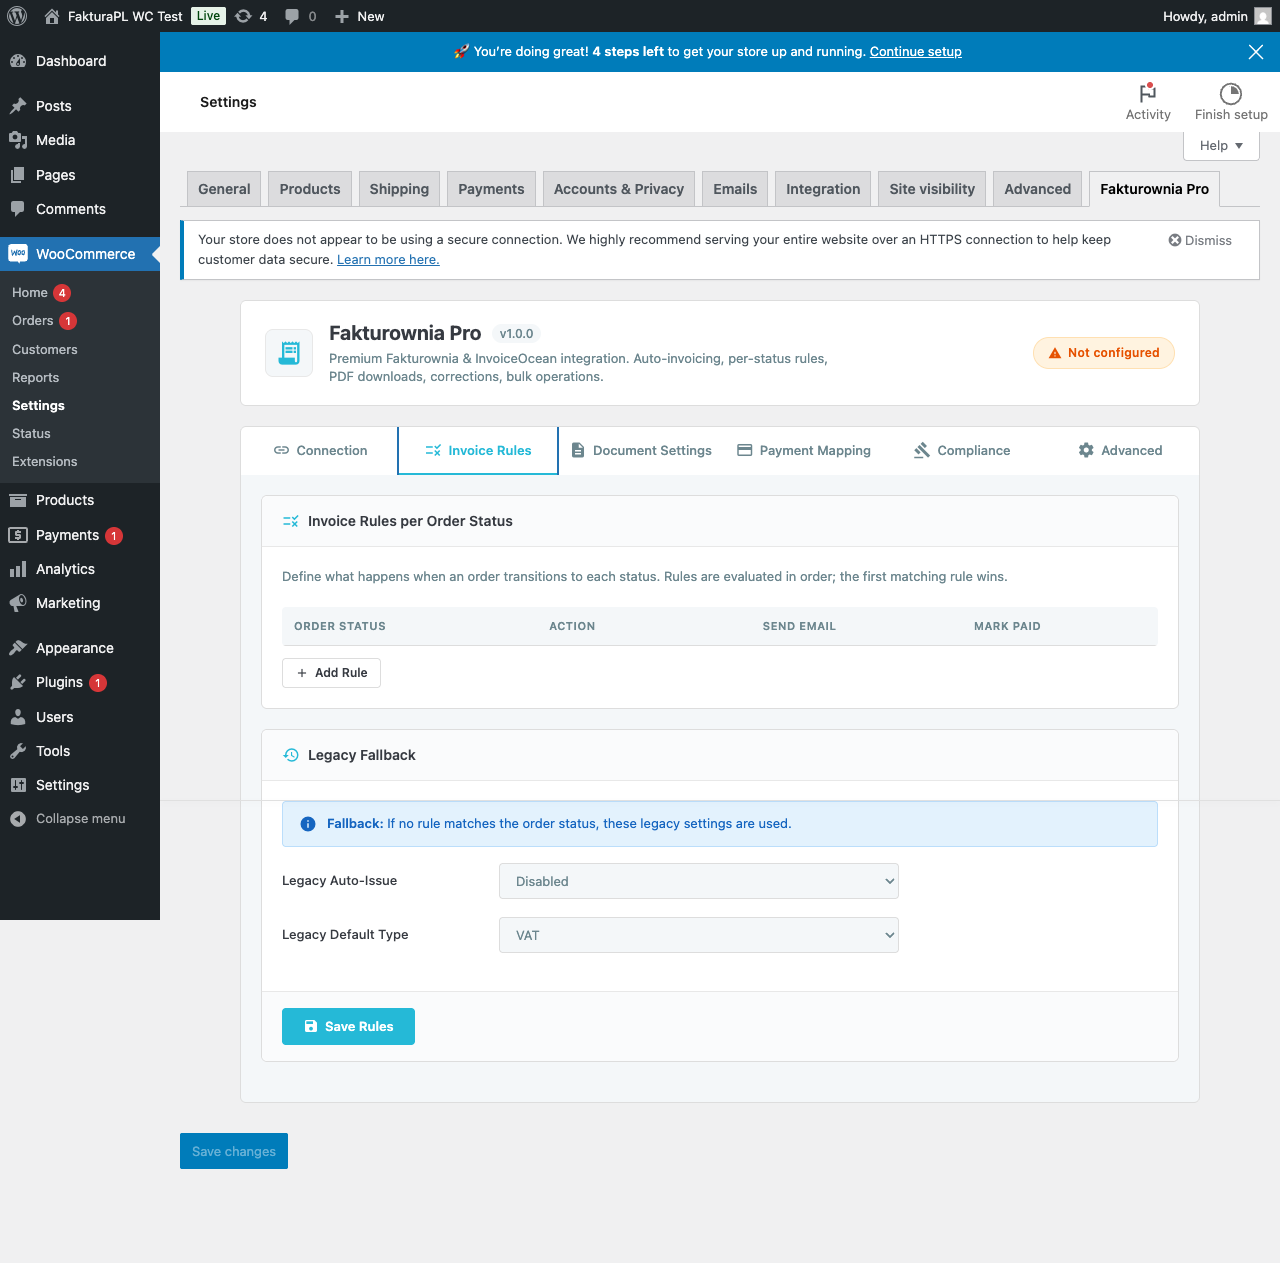
Recommended Starting Configuration
| Shopify Status | Action | Also Mark as Paid | Send Email |
|---|---|---|---|
| orders/paid (Payment received) | Create VAT Invoice | Yes | Yes |
| order/created (Order placed) | Create Proforma | No | No |
| refunds/create (Refunded) | Create Credit Note | — | Yes |
| orders/cancelled (Cancelled) | Cancel Invoice | — | No |
Why "Payment received" for VAT invoices, not "Order placed"? Polish tax law (and EU Directive 2006/112/EC) requires a VAT invoice only after the tax point is established. For e-commerce, the tax point is confirmed payment — not the order being placed. Issuing a VAT invoice on order placement creates mismatches if the order is later abandoned or cancelled.
You can change the rules at any time after the initial setup. See Invoice Rules for the full documentation.
Step 4: Enable Customer Portal (Optional)
The customer portal lets customers download their invoices from their Shopify account without contacting support.
- Go to Settings → Customer Portal
- Toggle "Enable invoice portal"
- Click Save
Requirement: The portal requires Shopify's new customer accounts experience. If you use legacy customer accounts, migrate first: Shopify Admin → Settings → Customer accounts → Use new customer accounts.
Step 5: Place a Test Order
Before going live, verify the integration end-to-end:
- Enable test mode in your Shopify Payments settings (or use the Bogus Gateway)
- Place a test order on your store
- Mark it as paid (this triggers the "Create VAT Invoice" rule if you followed the recommended setup)
- Check your Fakturownia account — a new invoice should appear within 30 seconds
- If you enabled "Send Email", check the customer email inbox for the invoice attachment
Test invoices are real Fakturownia documents. Delete them from Fakturownia manually after testing, or use a separate Fakturownia test subdomain for development work.
Plan Differences
Free Plan
The Free plan includes up to 20 orders per month with:
- Automatic VAT invoice creation
- Credit notes on refund
- PDF invoice downloads for the store owner
- Email invoice attachments
Limitations: No per-status rule configuration (rules fire on fixed defaults), no customer portal, no multi-currency support, no compliance features (OSS, GTU, Reverse Charge).
Starter ($9/mo)
- Up to 100 orders per month
- Per-status invoice rules (configure each Shopify status independently)
- Customer portal (invoices in Shopify customer account)
- Bilingual invoices (Polish/English)
- Multi-currency invoices
Growth ($19/mo)
- Up to 500 orders per month
- All Starter features
- EU OSS compliance
- GTU codes for JPK reporting
- Split payment (MPP) annotation
- Reverse charge for intra-EU B2B
- Shopify Flow triggers and actions
Professional ($29/mo)
- Up to 2,000 orders per month
- All Growth features
- Custom invoice templates
- Seller name override (multi-brand)
- Bulk invoice generation for historical orders
Enterprise ($39/mo)
- Unlimited orders
- All Professional features
- Priority support
- Dedicated account setup assistance
Webhooks and Real-Time Processing
Fakturownia Pro uses Shopify's webhook system to receive order status events in real time. When you install the app, it registers webhooks for the following events:
| Webhook topic | When it fires |
|---|---|
| orders/paid | Payment confirmed |
| orders/fulfilled | All items shipped |
| orders/cancelled | Order cancelled |
| refunds/create | Refund issued |
Shopify guarantees webhook delivery within seconds of the event. If a delivery fails (your server was temporarily unreachable), Shopify retries up to 19 times over 48 hours. Fakturownia Pro's duplicate prevention ensures that a retried webhook never creates a second invoice for the same order.
After Installation: Recommended Actions
-
Test the full order cycle — place a test order, confirm the invoice appears in Fakturownia, confirm the email attachment sends, and confirm the credit note is created when you issue a refund
-
Configure compliance features if applicable — EU OSS for cross-border B2C sales, GTU codes for JPK reporting, MPP for Polish B2B invoices over 15,000 PLN. See Compliance.
-
Enable the customer portal — greatly reduces "where is my invoice?" support tickets
-
Review the invoice template — go to Settings → Document Settings → Invoice Templates and select the layout that matches your brand. Confirm the seller name and address are correct.
Next Steps
- Configuration Guide — all settings tabs documented, template selection, payment terms
- Invoice Rules — full documentation of per-status rules and Shopify Flow integration
- Compliance — OSS, GTU, split payment, reverse charge